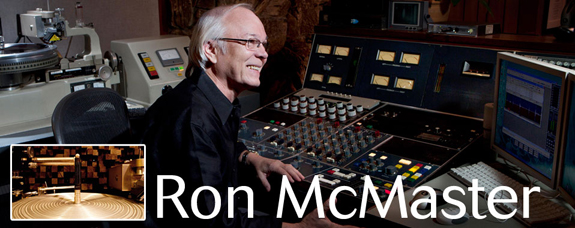
By Ron McMaster
As the premier vinyl cutting engineer for Capitol Records, Blue Note and EMI over the past few decades, Ron McMaster knows his way around the turntable. McMaster shares his knowledge of the vinyl making process and how you can get the most out of your next record release.
Choose your vinyl format • This depends on how much music you want to put out on vinyl and what will work best for your audience. The most common choices are 7” 45 rpm or a 12” 33 rpm, with other less common formats being 7” 33 rpm, 12” 45 rpm, 10” 33 rpm, or 10” 45 rpm. Ultimately, the more music you put on each side of a record the lower the volume will be. Balance is key––make sure both sides of your record are similar in length because overall loudness will be determined by the longest side.
Keep a close eye on total running time • This is probably the number one issue with most vinyl releases. A common mistake is to cram as much music as possible on the album, lowering fidelity, clarity and volume. Less is more. For example, a 12” LP at 33 rpm sounds best at 15 minutes per side and loses quality at 22 minutes. Your 7” 45rpm single will rock at three to four minutes per side and will start to fall off at five to six minutes.
Use the highest fidelity audio source • Analog tape (1/4” or 1/2”) is still the best and truest source for cutting vinyl. This may cost more in studio time, but gives you the warmth of true analog and because it is rarely found today, it can give you a new way to market to your fans. If you’re going digital, use the highest resolution possible. 24- bit audio will translate better than 16-bit CD quality audio so keep this in mind when you are mastering your CD. You may want to ask your mastering engineer for hi-res files for vinyl.
Prep your audio for vinyl cutting to save money • Because every album is different and some contain songs that segue into each other, I always request that clients provide one complete digital audio file for each side of their vinyl release. This way there are no spacing discrepancies. Vinyl masters are cut in real time and cannot be undone. Make sure to include the timings with your audio so your engineer knows the scope of what he needs to accomplish. For analog masters, all songs must be in the correct LP sequence with proper spacing and put on a reel. In the end, having your source files or analog tapes in order prior to your mastering session will save studio time.
The right song sequence is crucial • Put your most important and hottest tracks at the beginning of your side. As the record cuts closer to the center you lose some of the high end and brightness. Put your slower, softer tracks at the end of the side. Any of the loss that occurs will be much less noticeable.
Ask for a test vinyl acetate • If you have the time and a little extra budget, a vinyl acetate will allow you to hear what your music sounds like on vinyl and what EQ adjustments have been made prior to cutting the master discs. Acetates need to be carefully listened to on the first few passes because there is a loss of high end and clarity due to the softness of the material. Ultimately, you are also listening for any sibilance problems, level differences, as well as needle tracking problems.
Find the right pressing plant • This can be difficult depending on your location and the fact that there simply aren’t a lot of record pressing plants in operation today. Your mastering engineer is a good starting point for recommendations. Give yourself options and reach out to several pro’s about costs, turnaround time and whether they provide artwork services.
Choose a scribe number • This is a unique set of numbers or letters carved onto your vinyl masters by the mastering engineer in order to identify them at the pressing plant. This is essential because the plant will need something that clearly shows them which record is which as well as the correct sides.
It can be anything you want, a special number or you might be on a label that provides selection numbers as a way of tracking their product. Make sure you have this ready prior to cutting your lacquers.
Quality materials go a long way • If you’ve got the budget, I strongly recommend 180 gram vinyl. It is one of the best grades of vinyl available and there is no question that it will be much quieter than standard grade vinyl. If you’re thinking of colored vinyl, be aware that it is usually noisier than standard black vinyl. That being said, I’ve heard some very clean colored vinyl pressings, so whatever you choose always tell your sales person that you want test pressings and you want to listen to you album before going to the final pressing.
Don’t plan your release party until you’ve got your vinyl • I can’t stress this enough! If you send out the invitations before you have vinyl product in hand, I can guarantee that you won’t have your records for the party. It’s like a giant jinx on the album. This rule also applies to CD products but vinyl is even more temperamental to have pressed. In the end, if you allow yourself at least three to four weeks to complete this process you’ll have enough breathing room to make adjustments and fix any issues that may pop up. Your fans will be happier as well.
MiniBio • Ron McMaster is widely known for his legendary body of work as a vinyl mastering engineer at Capitol Records. He has mastered vinyl LPs for a wide variety of artists including Elvis Costello, Radiohead, Steve Earle, Tom Waits, Frank Sinatra and the Blue Note jazz greats. During his time at EMI/Capitol he has mastered multiplatinum albums and earned several Grammy awards and nominations. McMaster has also digitally mastered CD albums for Red Hot Chili Peppers, Shelby Lynne, Miles Davis and R.E.M., to name a few. His mark can be heard in Latin music as well, working with Marco Antonio Solis and Luis Miguel on their multiplatinum albums.

