Mixing and podcasting mixing have similarities, but require attention on different areas of your mix. Such variables include which frequencies you will need to pay attention to when mixing your vocal tracks. This means you likely will also need to pay more attention to correctly applying equalization and compression on your vocal tracks than if you are mixing a typical pop song.
When recording or streaming live, you should have a target level in mind for how hot your tracks will be. Each person or instrument should have their own track, and it is important to name your tracks in a way that makes sense to you. The goal is to have your gain levels correctly set up when you start recording, and to avoid as much as possible making minimal changes from the content after you captured it.
Once you have captured your session content, the next step is to organize your audio clips and then decide how much additional sweetening, i.e., additional equalization, compression or reverb your tracks will require. If you are streaming live onto OBS or a similar platform, you will have to take these factors into account before you start your livestream or broadcast.
For example, boosting the low frequencies in your vocal mix can help you to get your radio announcer voice on. Moving up the frequency spectrum, enhancing the upper mid-range can help dial in warmth and help you to tame harsh vocals. Keep in mind that nasal-sounding vocals can be fixed by adjusting high frequencies, which is where your ears are most sensitive to hear what your talent is saying. In general, carefully adjusting the equalization on your recorded or streaming content can help eliminate “tinny” or thin sounding vocal tracks and, in general, add warmth. Just remember when applying equalization to your tracks “a little goes a long way” and overdoing it can result in harsh sounding vocal tracks. When you are working with phone-in callers, use of a high or low pass filter can be an effective tool to help dial out unwanted background noise.
The same principle applies to compression and reverb. While it may be tempting to boost compression on your tracks to make them “louder in the mix,” too much compression can result in tracks that sound artificial or “squashed.” Applying too much reverb can make the difference between tracks that are “sweetened” versus completely washed out.
When mixing your content for podcasting there are many situations where it will be to your advantage to monitor your content through nearfield monitors, as opposed to headphones.
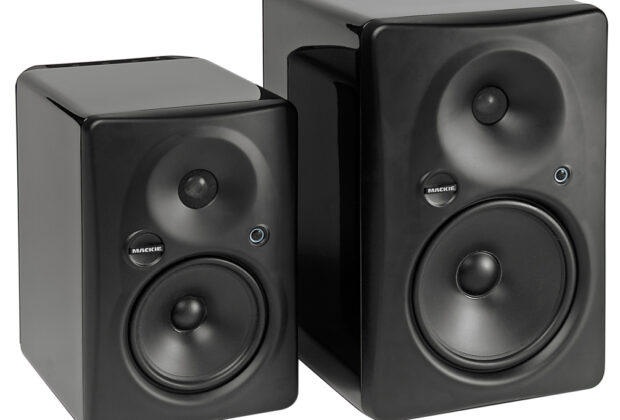
Mackie’s HR 824 MK2 are high resolution, two-way bi-amplified studio monitors. They are designed to deliver broad stereo imaging and flat, ultra-linear frequency response, which makes them a great choice for mixing vocal intensive content as would be found in a typical podcast. The Mackie HR 824 MK 2’s translates audio well to a variety of acoustic spaces, which is one of the reasons why even though they have been on the market for several years now, they remain a popular choice with musicians, content creators and producers.
The Mackie HR 824 MK 2’s utilizes a two-way crossover and has a total of 250 watts, 150 watts for the bass frequencies, 100 watts for high frequencies. Mackie’s HR 824 MK 2 makes use of a passive radiator for enhancing low frequencies and an integrated wave guide, which provides for good off-axis response. The Mackie HR 824 MK 2 has XLR, RCA and quarter inch inputs. On the back of the HR 824 MK 2 are controls to adjust input sensitivity, acoustic space, low and high frequency boost and cut as well as selectable on-off and standby modes. The front power button of the HR 824 MK II also functions as an overload indicator. The HR 824MK II Mackie has a passive radiator on the rear of each speaker for enhancing bass frequencies. The Mackie HR 824 MK II is designed to be placed horizontally.
As with all studio monitors, the correct placement of your monitors is an important factor to consider when setting up your studio. Plan to have your monitors placed away from walls and placed symmetrically in a triangle at your mixing position. Your monitors should be placed high enough on speaker stands so that the tweeters are firing at ear level. It’s recommended to put your monitors on top of isolation pads to help improve efficiency and to decouple them from whatever surface they are sitting on.
When mixing for podcasting you will likely be utilizing a combination of live and studio tracking and mixing techniques. There is much more to covering the basics of tracking and mixing audio for podcasting or general music production than can be discussed here. Just keep in mind to trust your ears and to mix preferably at a moderate or even low volume.
Mackie’s HR 824 MK 2 are available now for MAP $799.99 (for each speaker).
For more information and useful instructional videos check out mackie.com


